
In this guide, you will learn how to remove car seat. And
Lets start-
Removing a car seat might seem like a straightforward task, but ensuring it’s done safely and efficiently requires a bit of know-how.
Throughout this guide, we’ll delve into the intricate details of the removal process, emphasizing safety and the seat’s preservation.
Why Proper Removal is Essential?
Before delving into the removal process, it’s vital to understand why correct removal is as crucial as proper installation.
So, ensure the proper way before removing.
- Safety Considerations: Your child’s safety is paramount, and an incorrectly removed car seat can lead to damage that compromises its future use. Any overlooked attachment can lead to unwanted stress on the seat’s components, which might lead to malfunction during subsequent installations.
- Preserving the Integrity of the Car Seat: Maintaining the car seat’s condition ensures its longevity and optimal performance. A car seat is an investment in your child’s safety, so treating it carefully means safeguarding it.
Okay, now you are clear about proper removal. Let’s know some preparation before removal.
Preparing for Car Seat Removal
Like any task, the right preparation ensures smooth and hassle-free car seat removal.
- Gather Necessary Tools: While many car seats don’t require tools for removal, having a few essentials on hand can simplify the process. A flathead screwdriver or a car seat removal tool might be useful in some cases.
- Ensure a Clear Workspace: Ensure the area around the car seat is free from obstructions to facilitate easy removal. This makes the process smoother and reduces the risk of injury or damage to the car seat.
Also read: How To Loosen Graco Car Seat Straps
How to Remove Car Seat?
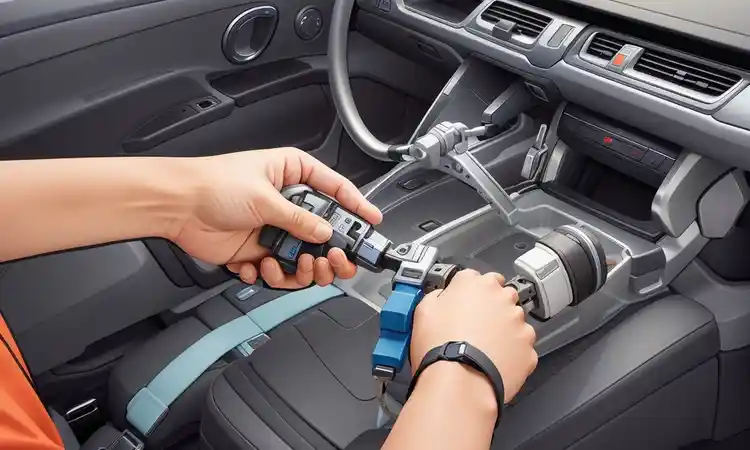
Understanding the Type of Car Seat Attachment
Different car seats employ various attachment methods, identifying yours is the first step.
- LATCH System: The LATCH system, common in newer cars, allows car seats to be anchored without seat belts. Typically, you’ll find lower anchors in the seat crack and a top tether anchor behind the seat.
- Seat Belt Attachment: The seat belt method is a classic approach for cars without the LATCH system or for those who prefer it. The seat belt goes through the car seat’s path and locks in place, holding the seat securely.
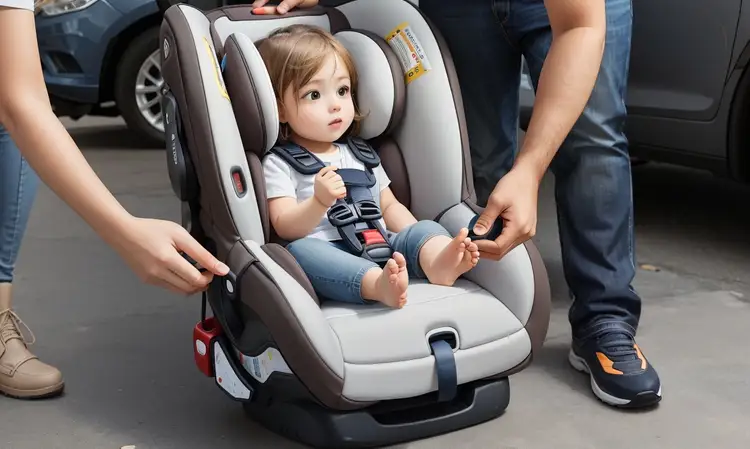
Removing the Car Seat
Ensuring a safe and efficient removal process is paramount, as it keeps the car seat in good condition and guarantees the child’s safety during subsequent installations.
Releasing the LATCH connectors or seat belt
- Begin by locating the LATCH connectors or seat belt path. The connectors are typically found between the back and bottom cushions of the rear seat. If you’re using the LATCH system.
- Identify the LATCH strap, usually marked by a button or tag.
- Press the release button on the LATCH connectors. While pressing, pull upward to release the hook from the anchor.
Also read: How To Clean Seat Belts
For those using the seat belt attachment
- Identify the seat belt path on the car seat.
- Slowly retract the seat belt, ensuring it doesn’t tangle or twist. Unlock the belt buckle and gently pull it out from the car seat’s path, ensuring not to let it snap back, as this could damage the belt or the car seat.
Detaching the Tether (if applicable)

- There’s often an additional tether strap for security for forward-facing car seats.
- Locate the tether strap, typically found at the top back of the car seat.
- Follow the strap to where it attaches, usually to a designated anchor point behind the vehicle’s seat.
- Release the rope by pressing its release mechanism and gently extracting it from its anchor.
Lifting the Seat Out
- Once you’re sure all attachments are released, it’s time to remove the car seat.
- Stand in a stable position, ensuring a clear path to lift the seat.
- Using both hands, grip the car seat firmly on both sides.
- Lift the car seat upward steadily, ensuring not to twist or turn it abruptly, which might damage the connectors or the seat itself.
- Place the car seat on a flat, stable surface immediately after removal to prevent it from falling or getting damaged.
Tips for Storage and Future Use
Storing your car seat properly is as crucial as ensuring its correct installation. Proper storage techniques can extend the lifespan of the car seat and guarantee its safety features remain intact for future use.
Cleaning Before Storage
Also read: How To Clean Car Seat Straps
Before storing your car seat, it’s essential to give it a thorough cleaning.
- Materials: Utilize a mild detergent and warm water. Avoid harsh chemicals or bleach, which can deteriorate the fabric and compromise the seat’s integrity.
- Process: Remove the seat cover, if possible, and wash according to the manufacturer’s instructions. For the hard parts of the seat, wipe them down with a damp cloth. Ensure all parts are completely dry before reassembling to prevent mold or mildew growth.
- Inspection: This is also an excellent time to inspect the car seat for any signs of wear and tear. Check for frayed straps, cracks, or any other damages.
Storing in a Cool, Dry Place
The environment in which you store the car seat can significantly impact its condition.
- Temperature: Extreme temperatures, especially heat, can weaken the plastic and compromise the car seat’s structure. Avoid storing the car seat in attics, basements, or garages where temperatures fluctuate drastically.
- Moisture: Damp environments can lead to mold and mildew growth. Ensure the storage area is dry and well-ventilated.
- Position: Store the car seat upright to maintain its shape. Avoid placing heavy items on top of it, which can deform its structure.
Regular Inspections
Even while in storage, inspecting the car seat periodically is a good practice.
- Expiry Date: Car seats come with an expiration date, typically marked on the seat itself or in the user manual. This data considers the wear and tear and the potential degradation of materials over time. Always adhere to this date and replace the seat if it’s past its expiration.
- Recalls: Manufacturers occasionally issue recalls for car seats if they discover potential safety issues. Regularly check the manufacturer’s website or the National Highway Traffic Safety Administration (NHTSA) site for any recalls related to your car seat model.
By adhering to these storage and maintenance tips, you ensure the longevity and safety of your car seat, making it a reliable piece of safety equipment for your child for years to come.
Final Thoughts on Car Seat Removal
Removing a car seat is more than just a simple lift, it’s a process that, when done correctly, guarantees the safety and longevity of the seat for future use.
By following this guide, you’re ensuring your child’s safety and prolonging the car seat’s usability.
So, above this guide, I hope you know clearly how to remove car seat.
Also read: Can You Feed a Baby in a Car Seat
Frequently Asked Question (FAQ)
| Frequently Asked Question | |
|---|---|
| How often should I remove and clean my car seat? | Ideally, you should clean your car seat whenever there are spills or noticeable dirt. Thorough cleaning and inspection every few months can also help maintain its condition. |
| Can I reinstall the car seat myself after removal? | Absolutely! However, always refer to the manufacturer’s manual for installation guidelines. If uncertain, consider seeking expert assistance. |
| Are there any signs of damage I should look for after removal? | Check for visible cracks, frayed straps, or compromised locking mechanisms. If you spot any of these signs, it might be time to replace the seat. |
| How long can I store a car seat before it’s no longer safe? | Car seats typically come with an expiration date, usually around 6-10 years from the manufacturing date. Always check and adhere to this date to ensure safety. |